
The Setup
After building a home SOC lab with Splunk and catching a web shell scanner probing my server with 580 requests, I had a follow-up thought: what if I did not have to be at the keyboard to respond to this stuff?
The manual workflow was getting old. Attacker hits the server. Splunk alerts. I log in, investigate, run ufw deny, close the terminal. Repeat. It worked but it required me to actually be awake and paying attention, which is frankly a design flaw.
So I built an automated incident response playbook script. It runs as a persistent systemd service, monitors my server logs in real time, detects two specific threat patterns, fires a formatted Slack alert with the attacker details, and automatically blocks the IP via UFW. No manual intervention required.
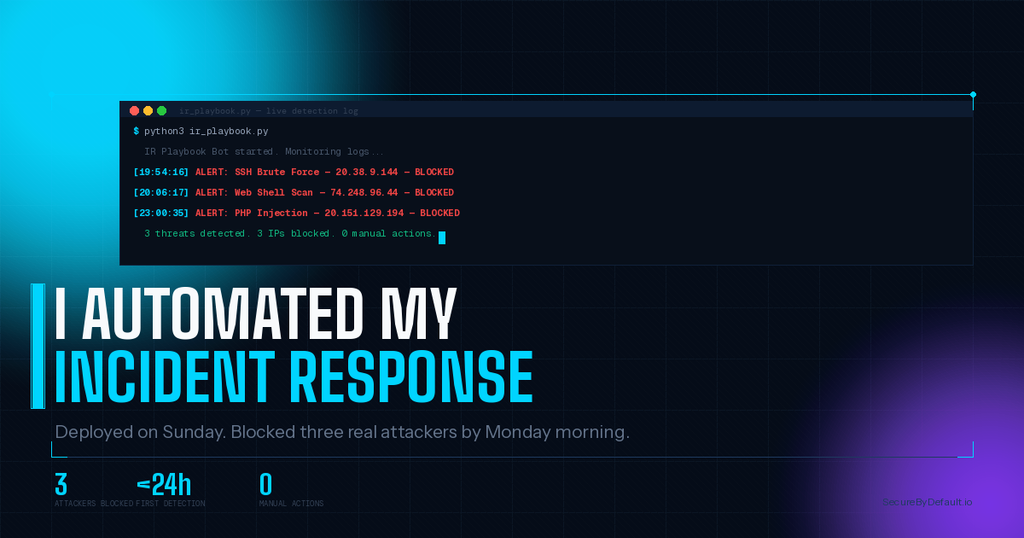
Within 24 hours of deploying it, three real attackers had been detected and blocked overnight while I slept. Which is either a great outcome or a depressing commentary on how many people are scanning the internet at 11 PM on a Sunday. Probably both.

What the Bot Detects
The script monitors two threat patterns that showed up repeatedly in the Splunk lab data.
SSH Brute Force Attempts
The script reads the systemd journal for Invalid user events. When the same IP hits the threshold of 3 failed attempts it fires a Critical Slack alert and blocks the IP. On a hardened server with SSH key-only authentication these events still appear in the journal even though the connection is rejected before any password is attempted. That means the detection works correctly regardless of whether password authentication is enabled.
Web Shell Scanner Activity
The script reads the Nginx access log and flags any IP sending requests to suspicious PHP paths. The pattern list covers randomized PHP filenames, WordPress-specific backdoor paths, .env file probes, and known shell names. After 10 matching requests from the same IP it fires an alert and blocks the IP.
How it Works
The architecture is intentionally simple. A Python script runs in an infinite loop with a 60-second sleep between each check. On each iteration, it reads new lines from the Nginx access log and queries the systemd journal for SSH events since the last check. If a threshold is crossed it fires a Slack webhook and runs UFW.
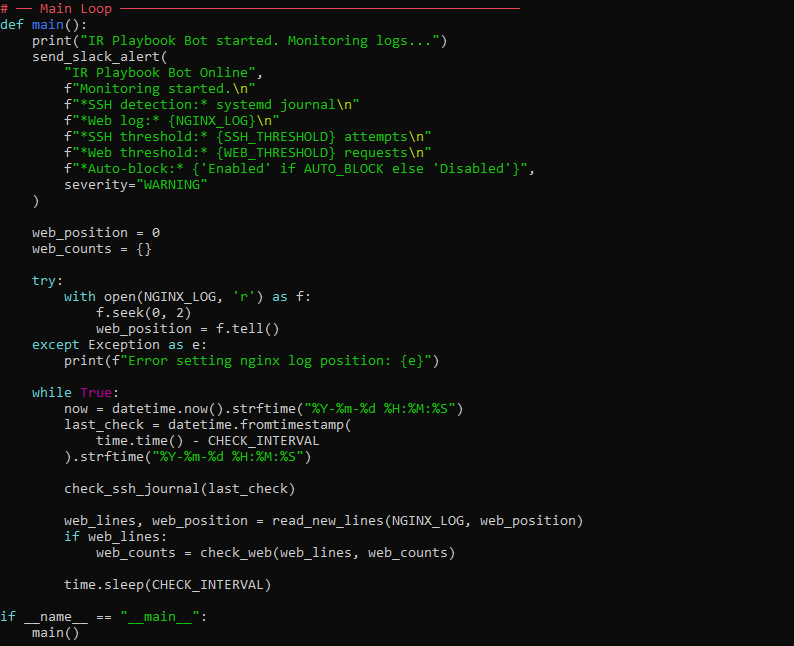
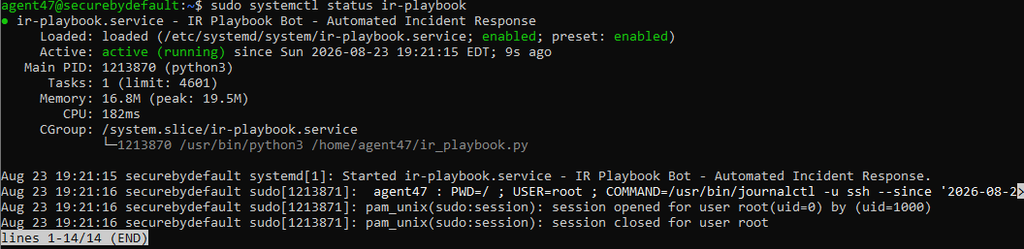
The script runs as a systemd service so it starts automatically on every reboot and restarts itself if it crashes. The service file is straightforward:
One important detail, the script needs to run two sudo commands (journalctl and ufw) without a password prompt since there is no interactive terminal when running as a service. The fix is a targeted sudoers entry that grants passwordless access to exactly those two commands and nothing else. Least privilege, same as it should be.
What Happened When it Went Live
I deployed the bot on a Sunday evening. By Monday morning it had caught three real attackers. None of these were test data. All three were legitimate malicious actors scanning the internet and running into my server.
| Time | Attacker IP | Path Probed | Attack Type | Result |
|---|---|---|---|---|
| 7:54 PM Sun | 20.38.9.144 | /.env.sample | Credential harvesting | Blocked |
| 8:06 PM Sun | 74.248.96.44 | /100.php | Web shell scanner | Blocked |
| 11:00 PM Sun | 20.151.129.194 | /classwithtostring.php?p= | PHP object injection | Blocked |
Detection 1: Credential Harvesting at 7:54 PM
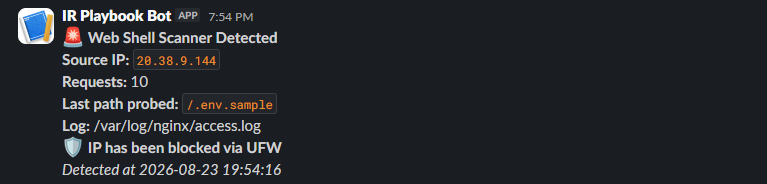
The first alert came in less than two hours after deployment. 20.38.9.144 was probing for /.env.sample, a file that contains application environment variables including database passwords, API keys, and service credentials. This is one of the most common automated scans on the internet because exposed .env files are a goldmine for attackers who find one. This server does not have one. The probe returned 404, Slack fired, UFW blocked.
Detection 2: Web Shell Scanner at 8:06 PM
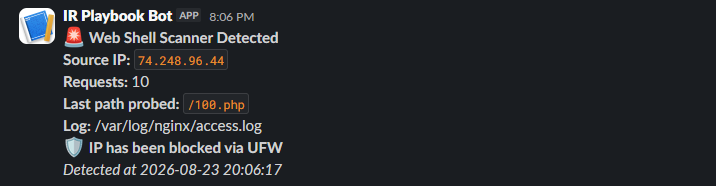
Twelve minutes later a second IP showed up. 74.248.96.44 was probing for /100.php, a randomized PHP filename associated with web shell scanning. The same pattern we saw in the Splunk lab with 580 requests from 4.223.96.99, just a different IP and filename. Detected, alerted, blocked.
Detection 3: PHP Object Injection at 11:00 PM
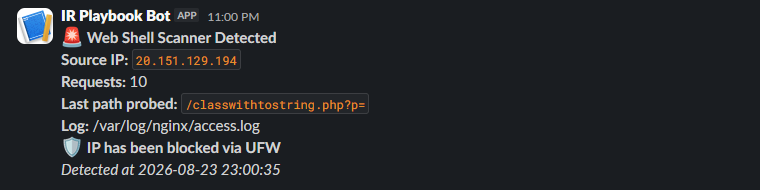
The late night one was the most interesting. 20.151.129.194 was probing for /classwithtostring.php?p=, a path associated with PHP object injection attacks and Java deserialization exploits. The ?p= query parameter is the tell: the attacker was testing whether a PHP file would accept and execute a serialized object passed as a parameter. This is a more sophisticated probe than a generic web shell scanner and suggests an automated tool specifically targeting PHP deserialization vulnerabilities. Detected at 11 PM while I was asleep. Blocked automatically. Zero manual intervention.
The Key Functions
The script has three main pieces worth understanding if you want to build your own.
The Slack Alert Function
Every detection routes through a single send_slack_alert function that formats the message with an emoji, timestamp, and structured fields before posting to the webhook. Keeping alerting centralized means the format is consistent regardless of which detection triggered it.
The UFW Block Function
Auto-blocking is optional via the AUTO_BLOCK flag. When enabled, a confirmed attacker IP gets a UFW deny rule added immediately after the alert fires. The function uses subprocess to run the UFW command and reports success or failure back to the caller so the Slack message can include the block confirmation.
The Detection Loop
The main loop tracks the last read position in the Nginx log file using Python’s file seek and tell methods. On each iteration it reads only the new lines added since the last check, which means it does not reprocess the entire log file every 60 seconds. For the SSH journal it queries journalctl with a –since timestamp set to one check interval ago.
Build Your Own
The full script and installation guide are on GitHub. Here is the short version of what you need:
- Ubuntu Linux server (tested on 24.04)
- Python 3 with the requests library installed
- A Slack workspace with an incoming webhook configured
- Nginx with access logging enabled
- UFW firewall installed and active
The full README on GitHub walks through the complete installation including the sudoers configuration, the systemd service file, and the Nginx log permission fix that is required for the script to read the access log as a non-root user.
GitHub: https://github.com/RonMercier/ir-playbook-bot
Takeaways
- Automation does not have to be complex to be effective. This is a 150-line Python script running a while loop. It caught three real attackers in its first 24 hours.
- The systemd service pattern is worth learning. Any Python script that needs to run continuously on a Linux server should be a service, not a cron job or a backgrounded terminal session that disappears on reboot.
- The sudo least-privilege pattern matters. Granting passwordless sudo for exactly two specific commands is meaningfully more secure than broad sudo access, even on a personal server.
- Real attack data is more compelling than lab data. Every detection in this post came from genuine malicious activity, not simulated traffic. If you run a public-facing server, you will see real attackers within hours of deployment.
Get the security checklist most
businesses skip.
A free 25-point audit covering the exact gaps attackers hit first, written by an engineer in plain language. Plus one practical security breakdown every Tuesday.
Get the Free Checklist →Free on signup · Unsubscribe anytime · ~1 email per week