
Disclosure: This post contains affiliate links. If you purchase through these links, I may earn a small commission at no extra cost to you. I only recommend tools I would trust with my own infrastructure.
I hadn’t even published my first blog post yet.
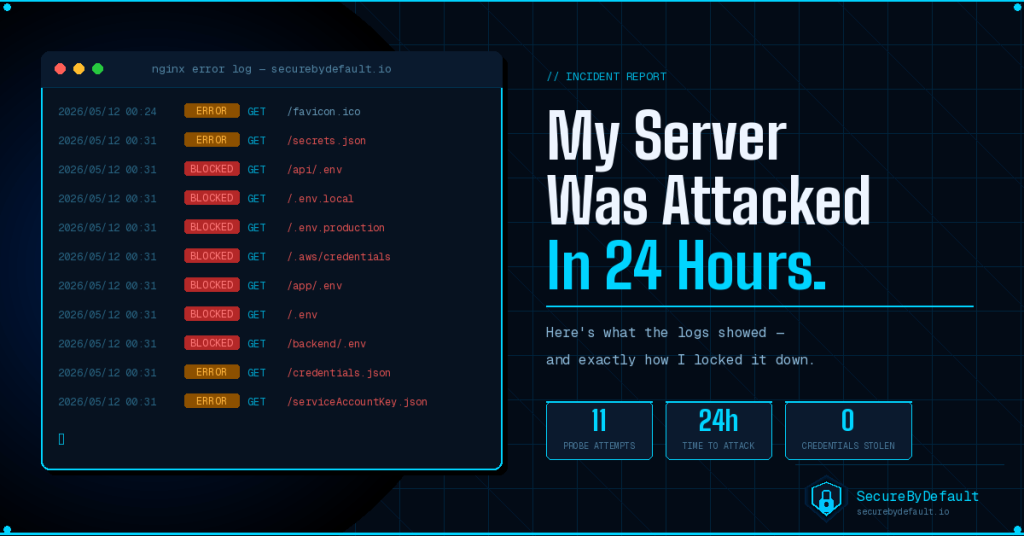
The server was brand new. The ink was barely dry on the SSL certificate. I hadn’t shared the URL with anyone. And yet, when I checked my Nginx error logs less than 24 hours after going live, I found this waiting for me:
GET /.env HTTP/1.1
GET /.aws/credentials HTTP/1.1
GET /secrets.json HTTP/1.1
GET /.env.local HTTP/1.1
GET /.env.production HTTP/1.1
GET /backend/.env HTTP/1.1
GET /credentials.json HTTP/1.1
GET /serviceAccountKey.json HTTP/1.1
Welcome to the internet. Population: bots, more bots, and the occasional human.
If you’ve never seen an attack log before, that list above is an automated bot methodically checking my brand new server for accidentally exposed credential files, including AWS keys, environment variables, API tokens, Google service account files. The kind of stuff that, if found, would let an attacker spin up thousands of cloud servers on your bill, drain your accounts, or sell access to other threat actors.
This wasn’t a targeted attack. Nobody specifically came after me. This is just what happens the moment a new IP address appears on the internet. Automated scanners find it within minutes and immediately start probing for low-hanging fruit.
And honestly? As someone who spent years doing incident response at Akamai, watching this happen to my own fresh server was equal parts alarming and fascinating. Like being a chef who finally sees what happens in their own kitchen when they step out.
Let me walk you through exactly what I saw, what it meant, and how I locked it all down.
First – Why Does This Happen So Fast?
Here’s something most people don’t realize: the internet is constantly being scanned. Every public IP address. Every port. All the time.
According to the 2026 Cloudflare Threat Report, 94% of all login attempts now originate from bots. Not 40%. Not 60%. Ninety-four percent. The internet’s default state is automated probing, and your server is not special, it’s just another IP address in a very long list.
These bots don’t need to know who you are or what your site does. They’re running 24/7 scanning every IP range for known vulnerable paths. They check for exposed credential files, default login pages, outdated software versions, and misconfigured directories. It takes seconds per target.
Think of it like a thief walking down a street trying every car door handle. They’re not targeting your specific car; they’re just checking everything, moving fast, and stopping when something opens.
My server was a new car on a street full of thieves. Except the thieves never sleep and there are millions of them.
What the Logs Actually Showed
Let’s break down exactly what these bots were looking for and why each one matters:
The .env File Hunt
GET /.env
GET /.env.local
GET /.env.production
GET /api/.env
GET /app/.env
GET /backend/.env
.env files are used by developers to store configuration variables, database passwords, API keys, secret tokens. They’re meant to stay on the server, never exposed to the web. But developers accidentally expose them all the time by misconfiguring their web server.
When a bot finds an exposed .env file, it’s like finding a house key under the doormat; except the key also opens the safe, the car, and the neighbor’s house. A single .env file can contain credentials for your entire cloud infrastructure.
This is not a theoretical threat. A 2026 Cisco Talos investigation found a campaign that had compromised over 750 servers specifically, by harvesting exposed credential files and pulling database connection strings, SSH private keys, AWS secrets, and GitHub tokens at scale.
The AWS Credentials Probe
GET /.aws/credentialsThis one is particularly nasty. AWS credential files contain your Access Key ID and Secret Access Key, essentially the master keys to your entire Amazon Web Services account. If an attacker gets these, they can spin up hundreds of GPU instances for crypto mining, exfiltrate all your S3 data, or simply rack up a five-figure AWS bill before you notice.
Cloud credential theft is so common that AWS has an entire automated system that monitors for exposed keys on the internet and alerts you. But by the time you get that alert, it’s often already too late.
The JSON File Sweep
GET /secrets.json
GET /credentials.json
GET /serviceAccountKey.json
serviceAccountKey.json is a Google Cloud service account key file. If you’ve ever set up a Google Cloud project and downloaded credentials, this is that file. Exposed, it gives full programmatic access to your GCP resources.
secrets.json and credentials.json are generic names that developers often use for secrets and credentials. Bots know the naming conventions developers use because developers are, charitably, predictable.
The Bonus Round – Virtual Host Hijacking
The logs also showed requests coming in with a Host header of frostbornwarriors.com instead of securebydefault.io. This is a virtual host confusion attack, which is sending requests with a fake Host header, hoping to hit a misconfigured default Nginx vhost that might serve content from a different directory.
It’s a bit like calling a hotel and asking to be put through to ‘whoever answers’ rather than a specific room, hoping to reach the owner’s private line by accident. Sneaky, but ultimately unsuccessful here.
The Good News – My Server Blocked Almost Everything
Here’s where the story gets more interesting than just ‘bad things happened.’ Most of those requests in my logs weren’t successful, they were blocked.
The exceptions were a handful of files that initially returned 200 OK before I tightened the configuration. Which brings us to the actual useful part of this post: what I did to lock everything down.
Get the same baseline I use for servers, cloud accounts, backups, access control, and exposed files. It’s free, no fluff.
Get the Free Checklist →How I Locked It Down – The Complete Fix
Here’s every security measure implemented on this server, in the order I did them. You can use this as a checklist for any new Linux server you deploy.
1. Block Sensitive File Types in Nginx
The most direct fix is to tell Nginx to explicitly deny access to file types that should never be publicly accessible. This goes inside your server block:
# Block sensitive files inside your web root
location ~* \.(ini|log|conf|bak|sql|sh|env|config|backup|gz|tar|zip)$ {
    deny all;
    return 404;
}
Note the return 404 instead of 403. Returning 403 Forbidden confirms to an attacker that the file exists but is protected. Returning 404 Not Found tells them nothing useful. Small detail, meaningful difference.
2. Block Wrong Host Headers
To stop the virtual host hijacking attempts, add a check that drops requests from anyone using the wrong Host header:
if ($host !~* ^(securebydefault\.io|www\.securebydefault\.io)$) {
    return 444;
}
Return 444 is an Nginx-specific response that closes the connection with no response at all — no headers, no body, nothing. From the attacker’s perspective the connection just dies. Satisfying to configure.
3. Install and Configure Fail2Ban
Fail2Ban monitors your logs and automatically bans IP addresses that repeatedly probe your server. Install it with:
sudo apt install fail2ban -yConfigure it with ban times, retry limits, and rules for both SSH and Nginx. A properly configured Fail2Ban means the same IP can only probe you a handful of times before it’s automatically blocked for hours or days.
4. Disable XML-RPC on WordPress
WordPress’s XML-RPC endpoint is a legacy feature that’s actively exploited for brute force attacks. If you’re running WordPress and don’t need it, block it entirely:
location = /blog/xmlrpc.php {
    deny all;
    return 404;
}
5. Set Up UFW Firewall
Ubuntu’s Uncomplicated Firewall should be configured to only allow the ports you actually need. For a web server running SSH, HTTP, and HTTPS:
sudo ufw allow 22/tcp
sudo ufw allow 80/tcp
sudo ufw allow 443/tcp
sudo ufw enable
Everything else, and every other port is closed by default. An attacker scanning your server for open services will find exactly three doors, and two of them redirect to HTTPS.
6. Harden SSH Access
Password-based SSH login should be disabled entirely in favor of key-based authentication. Once you’ve confirmed your SSH key works, set these in /etc/ssh/sshd_config:
PasswordAuthentication no
PermitRootLogin prohibit-password
This eliminates brute force SSH attacks entirely. Without password authentication enabled, there’s nothing to brute force, which means every login attempt without a valid key fails immediately.
7. Install Wordfence (If Running WordPress)
Wordfence adds a web application firewall, malware scanner, and brute force protection specifically for WordPress. After installing it, run a full scan immediately to establish a baseline. You want to know your starting state before something changes.
Enable two-factor authentication for your WordPress admin account as well. The login page is one of the most actively targeted endpoints on any WordPress installation.
For an extra layer of protection when accessing your server remotely, a reliable VPN encrypts your connection and prevents credential interception on untrusted networks.
NordVPN is what I personally use — it has Meshnet for secure device-to-device access and has been independently audited four times. Worth having in your toolkit.
The Bigger Picture & What This Means for Everyone
This experience isn’t unique to me or to new servers. According to Cloudflare’s 2026 Threat Report, bot traffic now exceeds human traffic on the internet overall. The internet’s default assumption is that you’re a target. Not because of who you are, but simply because you exist and have a public IP.
The attacks I saw in those logs weren’t sophisticated. They weren’t targeted. They were the digital equivalent of someone walking down every street in every city in the world, simultaneously, trying every door handle. The scale is what makes it dangerous, not the cleverness.
The good news is that basic hardening stops the vast majority of automated attacks cold. Bots are efficient precisely because they’re automated; they probe quickly and move on. A server that returns 404 on credential file paths, blocks wrong Host headers, and requires key-based SSH login is dramatically less interesting than the next server on the list that hasn’t been hardened.
Security doesn’t have to be complicated. It just has to be consistent.
Configure your firewall. Block sensitive file paths. Use key-based SSH. Keep your software updated. Those four things alone would have stopped everything I saw in those logs, and they’ll stop what’s in your logs too.
Key Takeaways
- New servers are scanned within minutes of going live, which is normal and expected
- Bots specifically hunt for exposed .env files, AWS credentials, and JSON key files
- 94% of all login attempts on the internet originate from bots (Cloudflare 2026)
- Returning 404 instead of 403 on blocked files gives attackers less information
- Return 444 in Nginx closes connections silently, which is ideal for bad Host header requests
- Fail2Ban automatically bans repeat offenders so you don’t have to manually manage blocklists
- Disabling password SSH authentication eliminates brute force attacks entirely
- Basic hardening stops the vast majority of automated attacks; it doesn’t have to be complicated
- A VPN adds an extra layer of protection for remote server access. NordVPN is my personal recommendation for IT professionals.
Get the security checklist most
businesses skip.
A free 25-point audit covering the exact gaps attackers hit first — engineer-built, no jargon. Plus one practical security breakdown every Tuesday. No fluff, no fear-mongering.
Get the Free Checklist →Free on signup · Unsubscribe anytime · ~1 email per week